Showing posts with label student teacher. Show all posts

Friday, June 7, 2013

Super-Speedy Sunflower Still Lifes

My super student teacher (now a proud graduate--congrats, LC!) started this Vincent van Gogh project with the third graders. I have done Vincent's sunflowers before, but it was nice to see how Miss Caruso approached it, particularly in a time crunch, as it was May and our classes were numbered. I like to do this project at the end of the school year 'cause sunflowers just scream SUMMER, HERE I COME!

After talking about VVG and his passion for fashion sunflowers, Miss Caruso had the kids prep their paper, drawing a border around their 9 x 12" white sheet, Phyl style! (Bless you, Phyl, you practical genius.) Then they painted the background using two colors, one on either side of their pre-drawn horizon line.


(This was great timing for our first day of this project--a few minutes were spent to introduce the project, kiddos glossed their coil pots, and then did this background portion.)

On the second day, students entered the art room to find some lovely (fake) sunflowers decorating their tables. These flowers served as inspiration for adding vases and flowers. Miss Caruso did a great demo showing how to twist and turn the brush to manipulate the paint into petals and leaves. Kiddos painted in this order:

1. Paint a vase and give it two values, VVG style:


2. Use a pencil to draw the brown centers of each flower you intend to paint:


3. Use the penciled centers as a guide to show where to paint the petals:


4. Once petals are done, go back and paint those centers (doing it in this order prevents a lot of "AHHH MY PETALS TURNED BROWN" panic attacks on the part of the 9-year-olds)

5. Go to town adding leaves, values, details, and the like!


6. Sit back and admire your work whilst telling your art teacher and student teacher how beautiful they look today amidst the field of sunflowers in the art room:


7. Clean up your mess, wash yo' hands, and tell your art teacher to stop using her iPhone to take pictures of your awesome artwork 'cause the lighting is all kinds of funky with this neon paint.

Anyway, there are 57698234 ways (I counted) to teach about van Gogh's sunflowers--for a quickie, I highly recommend this method. The timeline is fast but the results are fab!

Monday, May 6, 2013

Monochromatic Coil Pots AND Tips for Using Self-Hardening Clay

Like its cool cousin the pinch pot, coil pots are one of those projects that the vast majority of us probably do. There are many creative ways to jazz these stinkers up. But if you're like me, kiln-less, with 300 pounds of self-hardening/air-dry clay sitting in the corner staring back at you, the options are a bit more limited than our kiln-blessed amigos.

Luckily, this year, my student teacher arrived at the PERFECT time, ready to take over teaching just when third grade was ready to start the coil pot monotony fun! Thanks, Miss Caruso! :-)


We decided that to make the pots are little more interesting, we'd limit students' color choices. Miss Caruso ultimately opted to make the painting process monochromatic, and as is the case with many projects, the presence of boundaries really fostered creativity! It was also a good review of the color mixing we had done earlier in the year (here and here).


If you're going to coil without a kiln, I have a few tips for ya:
  • Consider giving your kids a practice day. I have found it VERY beneficial to use modeling clay to practice, taking the time to teach the physical making of the coils and subsequent construction of the pot. You can also use this class period to talk about the history of clay/coiling, why someone might coil as opposed to pinch their vessel, etc.
  • I highly recommend using the slip and score technique. Otherwise, your coils are bound to come apart.
  • I mix a small amount of white vinegar into my slip, which seems to build a better bond. Granted, it makes the art room stink even more than the usual Sharpie/paint/children after recess scent with which we're all so familiar, but a little stink isn't so bad.
  • Have your kiddos build their pot atop a canvas or other textural base. Even the self-hardening stuff will stick to your smooth tables. If you don't have the dough to invest in canvas boards, or if you want to use what you have (and/or you're just cheap like me, bah haha), small pieces of rough wallpaper will do the trick! (I have stacks of wallpaper sample books and chop those pages up for each kiddo.)
  • Just in case, have a hot glue gun and lots of glue sticks ready for when any poorly-made pots are dry and a-crackin'! The air-dry clay tends to undergo some major separation as it hardens.
  • Paint your pots with acrylic paint. Or, if you prefer tempera, seal the pot with a layer of acrylic gloss medium when all the painting is done and dried.
Any air-dry gurus have anything to add?

And hey, if you're reading this and you, too, are fire-free and are thinking, "girlfriend, there are a thousand ways to skin the coil pot cat, I've got crazy creative ideas for you!" then please, enlighten me!

'Til then, enjoy the one-color wonders!


Friday, May 3, 2013

Oldenburg-Inspired POPsicles

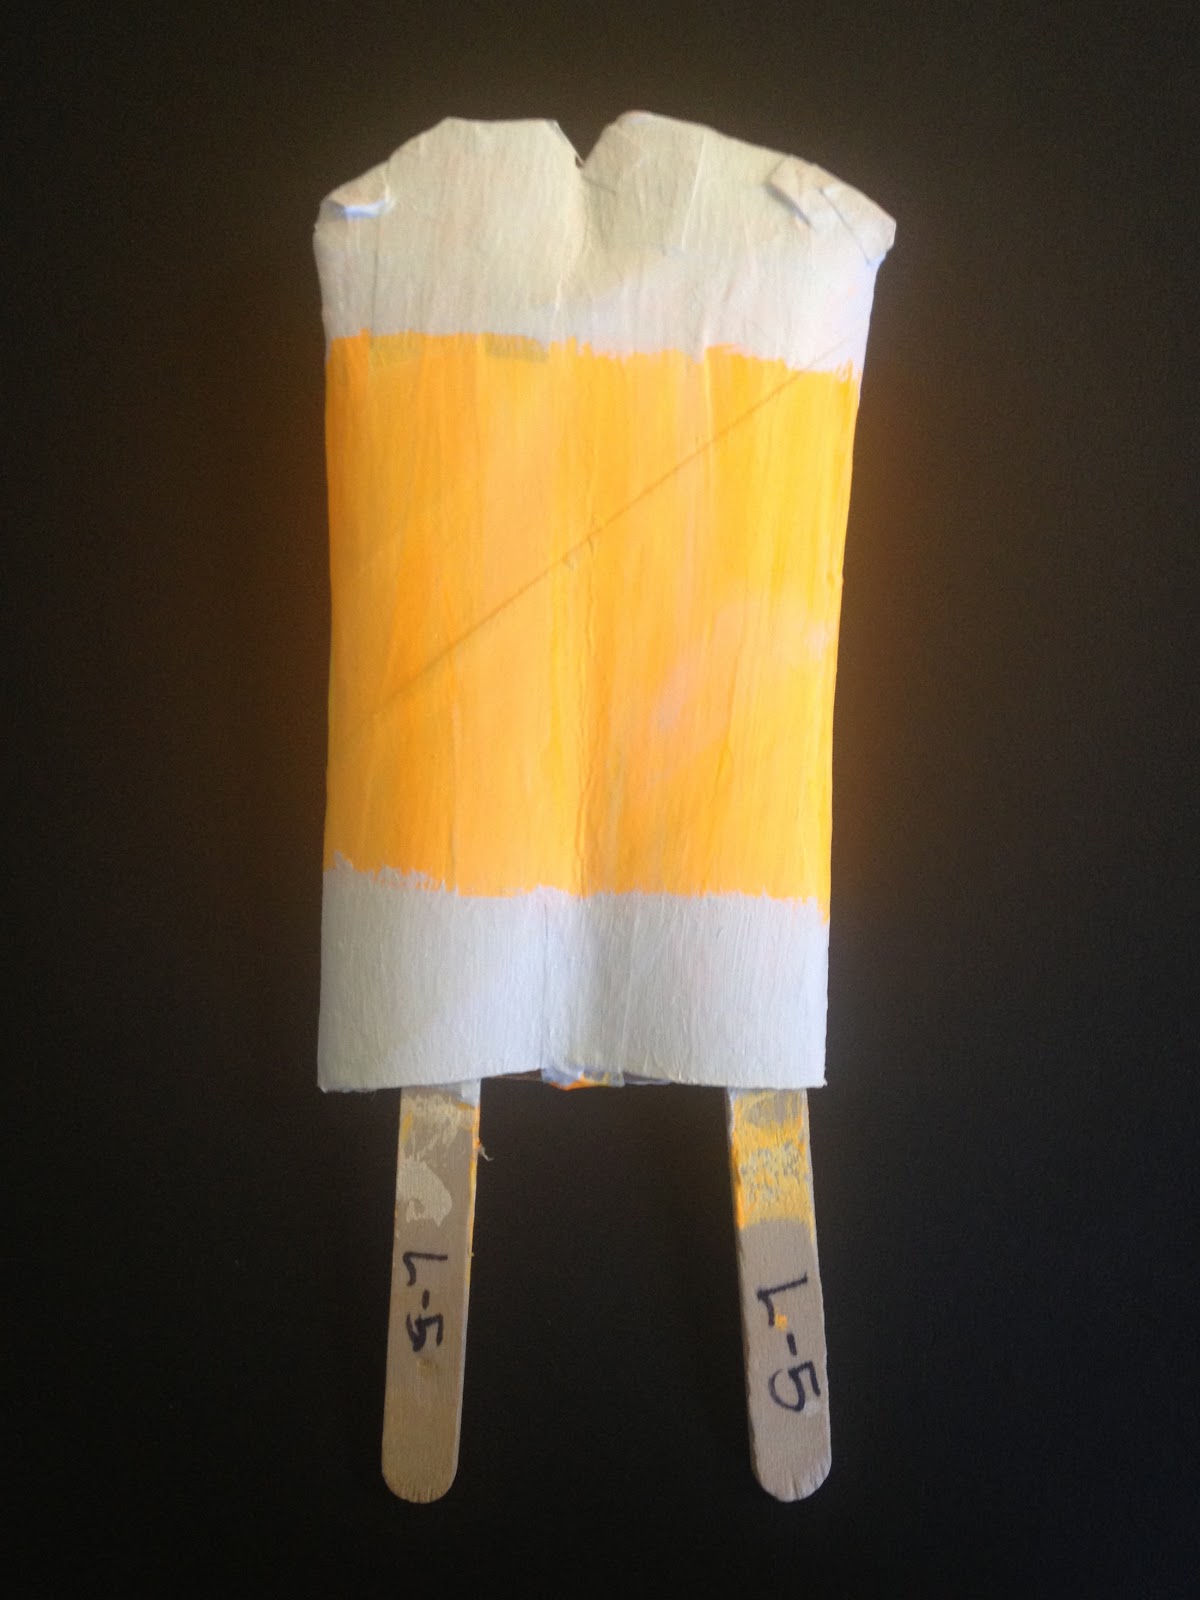
Instead of doing a clay project with my fifth graders this year, I decided to have them do small sculptures, a la Oldenburg. I found this lesson via Pinterest and knew I wanted to try it!

Miss Caruso (my student teacher) taught this one from start to finish and did a great job! To begin, she shared with the kids some Pop Art, including photos of works from famed soft sculptor Claes Oldenburg. She did an awesome job getting the kids to guess what materials were used, and how big the sculptures are in person. We found this video, which the kids loved:


Next up, she had the kids make their very own twin pops!

Using a toilet paper roll (or paper towel roll cut in half lengthwise), each kid smashed and folded their tube, then cut it to the proper shape:


Then closed off the entire top and bottom middle with masking tape:


Stuffed it with paper towel pieces to give some body:


And glued in some popsicle sticks to finish 'er off:


On the second day, kids painted their first coat of acrylic paint:


While the first coat dried, students worked on brainstorming their own proportion-funky sculptures via a worksheet that Miss Caruso developed. By the end of class, second coats had been added.


On the third and final day of the project, kiddos added other colors to finish off their Pop Art popsicles!


The majority of pops aren't very realistic (despite discussing this point and encouraging students to make a popsicle that a grocery chain might actually want to sell) and some of them are sloppy, but the kids liked making them and were thoroughly exposed to Oldenburg, sculpture, and Pop Art. So while I might alter the painting stipulations if I do it again, overall, I'm happy with the results.


And now I'm hungry. Again.

Friday, April 19, 2013

Cherry Blossoms with 1st grade

Wherever you might be reading this today, I hope you and your loved ones are safe and sound. Hopefully the innocence and artwork of our students is enough to make this day a little brighter despite all the bad going on in the world this week.

My sweet, sweet first graders have been learning about Japan, studying the beauty of cherry blossoms. Of course, there are bunches of ways to do blossom-inspired projects...

Art with Ms. Gram
alphamom
Creative Jewish Mom

I like the following version for a few reasons. The kids LOVE it, the results are beautiful more often than not, and it's a quickie, taking just one 45-minute period from introduction to project completion.


My student teacher, Miss Caruso, taught this this year, and it was a lot of fun for me to observe! First, she talked to the kids about the blossoms as a gift from Japan and showed a few masters' works--Hiroshige, Hokusai, van Gogh.

Next up, the kids blew watered-down black tempera paint all around their papers. Miss Caruso found that using straws was tricky for some kids, so some of our classes freestyled:


On the morning we did this with one group, the school had hosted a "Donuts with Dad" event, so everyone had sweet, sugary breath. Gross! Haha!

For the blossoms, Q-tips and pink paint were all it took to turn these black spider veins into beautiful branches!


For early finishers, a short video showed them a sped-up version of the same project:


These are always a huge hit in the annual art show. More on that soon!